Summary
This article provides instructions on managing notifications in Microsoft Teams.
There are multiple ways to access and manage Teams notifications. Follow the links to the task you want to achieve:
How-To
There are multiple ways to access and manage notifications in Microsoft Teams.
Task: To Mark Notifications as Read/Unread or Turn On/Turn Off Notifications for a Specific Channel.
Instructions
Step 1 - In Activity on the left side of Teams, select the three dots (...) button on a notification.
Step 2 - Select your desired action in the menu that displays.
Outcome
Notifications are marked as read/unread or notifications are turn on/off for a specific channel.
Back to top
Task: To Customize Notification Settings.
Instructions
Step 1 - In Teams, click the ellipse (...) next to the profile picture at the top-right corner.
Step 2 - Click Settings, and select Notifications from the menu.
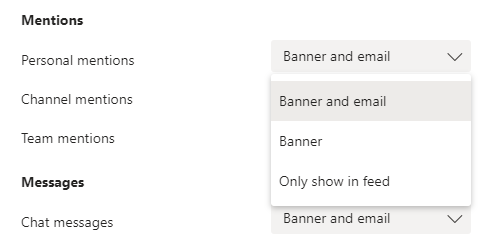
Outcome
The notifications settings menu displays. Here you can manage which notifications are received and where they show up on your system.
Back to top
Task: To Stop Email Notifications.
Step 1 - Locate the Missed activity emails drop down menu, and set it to Off.
Note: If email notifications are too frequent but you don't want them disabled, there are options to only receive emails every 10 minutes, 1 hour, and 8 hours.
Outcome
Messages in Teams will no longer be sent as emails.
Back to top
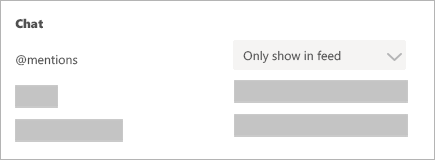
Task: To Keep Notifications in the Teams Application.
Step 1 - Locate the Chat heading and select Edit.
Step 2 - Select Only show in feed.
Note: Notifications will continue to display on your desktop taskbar, but not as notification pop-ups.
Outcome
All notifications are sent to your activity feed, which you can find at the top left corner of Teams.
Back to top
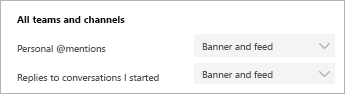
Task: To Receive Notifications in both the Teams App and on the Desktop.
Step 1 - Locate the Chat heading and select Edit.
Step 2 - Select Select Banner and feed.
Note: On Windows, notification banners display on the the bottom right of your screen. On macOS, they display on the top right.
Outcome
All notifications are sent as both desktop notifications and as alerts in your activity feed.
Back to top
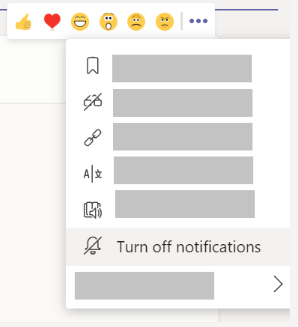
Task: To turn off notifications for specific conversations.
Step 1 - Go to the beginning of a conversation in a channel.
Step 2 - Go to the top right corner of the message and select the three dots for More options.
Step 3 - Select Turn off notifications.
Note:
- You'll still receive notifications if someone directly mentions you.
- To mute a channel conversation, Turn off notifications.
Outcome
You stop receiving updates for that specific conversation.
Back to top
Task: To choose your channel notifications.
Step 1 - Go to a channel that shows in your teams list and select More options > Channel notifications


Note: The default setting for channel mentions is deactivated. All new posts only display in Activity.
Outcome
You can choose what activity you get notifications for, and where they are displayed.
Back to top
Further Readings
LinkedIn Learning - Microsoft Teams
Teams: Managing Chat Sessions
Need additional help?
For assistance concerning site creation, content sharing, file synchronization, or other common SharePoint, OneDrive, Teams, or Office app activities, we recommend our Microsoft 365 Learning sites:
Learn more about the great tools our Microsoft 365 Learning sites offer!
Visit the Technology Help Desk Support page to locate your local campus contact information or to submit an online technology support request. For password issues you must call or visit the Help Desk in person.