Summary
This article provides instructions on how to access Microsoft Bookings and includes links to the procedures needed to create and manage a booking page.
How-To
Task: To access Microsoft Bookings.
Instructions
Step 1 - Open Office 365, select the app launcher and then select Bookings.
Outcome
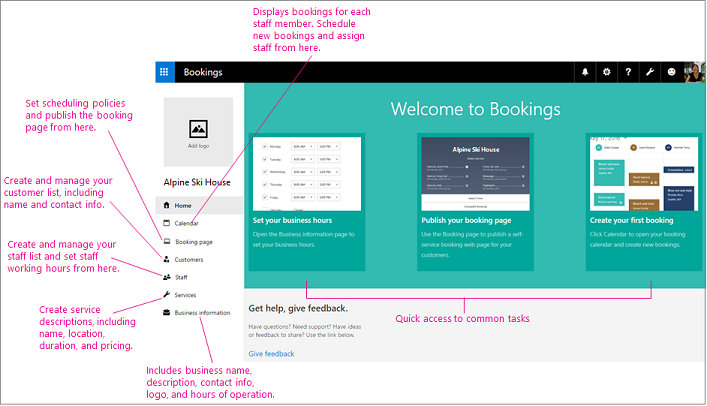
The first time you open the app, you'll see the home page, which includes a left navigation bar and three prominent tiles that guide you through setup and introduce new features.
Back to top
Task: To create a booking page.
Instructions
Step 1 - Enter your business information
Step 2 - Set your scheduling policies
Step 3 - Define your service offerings
Step 4 - Create your staff list
Step 5 - Set employee working hours
Step 6 - Schedule business closures, time off, and vacation time
Step 7 - Publish or unpublish your booking page
Step 8 - Create and staff your bookings
Outcome
A fully functioning Booking page is created.
Back to top
Need additional help?
For additional Training please visit the Teaching & Learning Technologies Training site.
To submit a support request, please fill out the Microsoft 365 Support webform with as much detail as possible, or contact the Technology Help Desk team on your local campus. For password issues you must call or visit the Help Desk in person.