Summary
This article lists the Microsoft 365 Group names for each campus. Use the list to share your Microsoft Teams and SharePoint site with the appropriate group. This is how you can share your site with all users from a specific a campus or from multiple or all campuses.
How-To
Task: To choose an appropriate audience for your SharePoint site.
Instructions
Step 1 - Click on the Cog or Gear icon in the upper right corner of your browser window.
Step 2 - Choose Site Permissions then Advanced Permissions link at the bottom of that flyout.
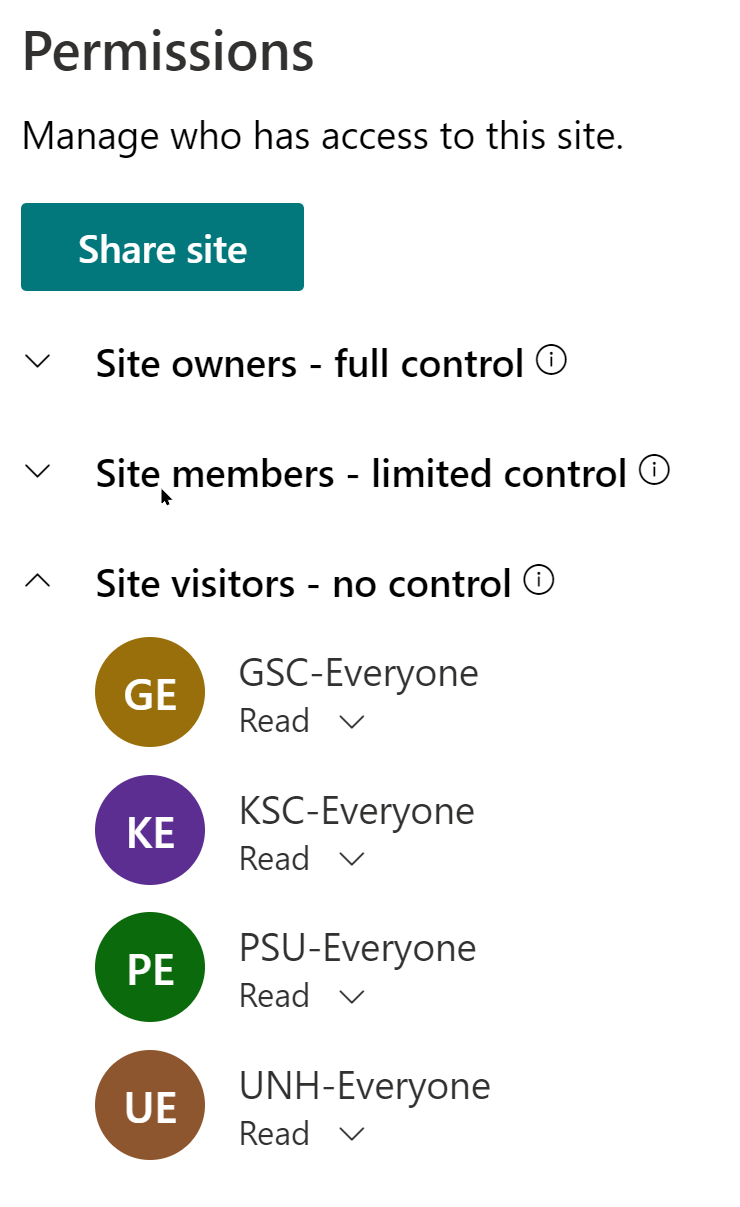
Step 3 - Select the appropriate group - "Site Name" Visitors is the best option.
Step 4 - Click on Share Site and un-check send email checkbox.
Step 5 - Start typing desired group for everyone from the table below. Click Add.
Repeat steps 4 & 5 to add more than one group.
Note: Everyone includes all USNH campuses, employees and students. Instead, use one of the targeted groups in the "Everyone" column below.
| Campus |
Group for Everyone |
Group for Faculty and Staff |
Group for Students |
| University of New Hampshire |
UNH-Everyone |
UNH-FacultyStaff-SP |
UNH-Student |
| Plymouth State University |
PSU-Everyone |
PSU-FacultyStaff-SP |
PSU-Student |
| College of Professional Studies (Formerly Granite State College) |
CPS-Everyone |
CPS-FacultyStaff |
CPS-Student |
| Keene State College |
KSC-Everyone |
KSC-FacultyStaff |
KSC-Student |
Outcome
Your site will now be shared to your chosen audience.
Further Readings
Microsoft SharePoint - Manage Permissions
Need additional help?
For additional Training please visit the Teaching & Learning Technologies Training site.
To submit a support request, please fill out the Microsoft 365 Support webform with as much detail as possible, or contact the ET&S Help Desk team on your local campus. For password issues you must call or visit the Help Desk in person.