Summary
This article details steps for creating, sharing, and, duplicating your Microsoft Forms. Follow the link to the task you want to achieve:
How-To
Task: To create a form.
Instructions
Step 1 - Log in to Microsoft Forms with your Microsoft 365 school/work credentials.
Or
Step 1 - Log in to Portal.Office.Com and select Forms from the navigation bar.
Step 2 - Select  New Form.
Step 3 - Enter a title and description for your form.
Note: Form titles can have up to 90 characters. Descriptions can have up to 1,000 characters.
Outcome
Your form is created and saved automatically.
Back to top
Task: To add questions to your form.
Instructions
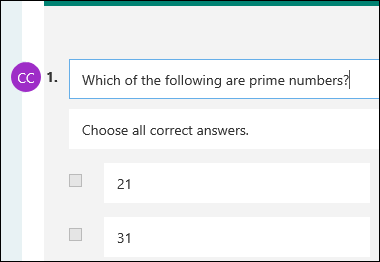
Step 1 - Select Add new to add a new question to your form.
Step 2 - Choose what kind of question you want to add, such as Choice, Text Rating, or Date question types.
Tip: For more question types, select More question types  and choose Ranking, Likert, File upload, or Net Promoter Score® question types.
Note: File upload is not available for GCC, GCC High, or DoD environments.
Tip: To format your text highlight a word or words, and then choose bold (CTRL/Cmd+B), italics (CTRL/Cmd+I), or underline (CTRL/Cmd+U) from the floating toolbar.
Note: Text formatting is gradually rolling out and will be available to everyone soon.
Step 3 - Select Section to organize sections for your questions.
Outcome
Questions are added to your form.
Important: If you delete a question, it is permanently deleted along with any response data that's been collected for that question.
Back to top
Task: To preview your form.
Instructions
Step 1 - Select Preview to see how your form will look on a Computer or Mobile device.
Step 2 - To test out your form, answer the questions in Preview mode, and then select Submit.
Step 3 - To continue editing your form, select Back.
Outcome
Your form displays, you answer the question and submit the form to confirm it works as expected or make edits.
Back to top
Task: To share a form with collaborators.
When you invite others to collaborate on your form or quiz, your co-authors can help add content, analyze responses, and share your form with others.
Instructions
Step 1 - In Microsoft Forms, open the form or quiz you want to share to collaborate.
Step 2 - Select Collaborate or Duplicate  .
.
Note: We're slowly rolling out the entry point for how to access the option of sharing your form to collaborate. If you don't see Collaborate or Duplicate , select Share and proceed to the next step.
Step 3 - Under Share to collaborate, select Get a link to view and edit.
Step 4 - Select one of the following collaboration permission options.
- Users with an Office 365 work or school account can view and edit - Anyone with an Office 365 work or school account, inside or outside of your organization, is assigned co-authoring permissions and can view and edit your form.
- People in my organization can view and edit - Anyone in your organization is assigned co-authoring permissions and can view and edit your form.
- Specific people in my organization can view and edit - Only people or groups in your organization that you specify are assigned co-authoring permissions and can view and edit your form.
Note: To collaborate on a form with specific people in your organization, only users with a valid Office 365 mailbox can be selected. Users with other mailboxes, such as those hosted on dedicated Microsoft Exchange Servers and accessed via REST APIs, are not supported. For more information, refer to REST API supported mailbox error
Step 5 - Select Copy. You can now paste this link wherever your co-authors can access it, such as in an email, notebook, or Teams.
Notes about co-authors:
- You can designate up to 100 co-authors on a single form, and this can be a mix of individuals or groups. A group (no matter how many people belong to the group) counts as one co-author.
- Anyone you've specified as a co-author that has access to the collaborate link of your form can view and edit both questions and response data.
- Anyone you've not specified as a co-author cannot use the collaborate link to access your quiz or form.
- When you share a form or quiz to collaborate, you still remain the owner and it remains in your Forms portal, but your co-authors can view and edit it through the link you shared with them. At the top of the form or quiz that you've shared, you can see the initials of each person currently making edits.
- Co-authors are not able to modify permission levels of collaboration. For example, if you, as the form owner, have set permissions to, People in my organization can view and edit, your co-authors will not be able to change that permission level to a different one (e.g. Users with an Office 365 work or school account can view and edit). As the form owner, you're the only one who can select a different permission setting.
- You'll also see display icons with initials of people or groups next to each section currently being edited.
Outcome
Your form is shared with the selected group.
Back to top
Task: To stop sharing a form or quiz.
Instructions
Step 1 - In Microsoft Forms, open the form or quiz which has the collaborate link.
Step 2 - Select Collaborate or Duplicate .
Note: We're slowly rolling out the entry point for how to access the option of sharing your form to collaborate. If you don't see Collaborate or Duplicate , select Send and proceed to the next step.
Step 3 - Select the Trash icon next to the text box that displays the form link.
Step 4 - Select Remove link to permanently remove the collaborate link. Select Cancel if you change your mind and don't want to remove the collaborate link.
Note: Once you've removed the collaborate link, it's unusable for anyone that tries to click or tap on it. You can't recreate the same collaborate link and need to generate a new, unique one to share with others.
Outcome
What users can expect to happen after completing the steps in the how-to knowledge base article.
Back to top
Further Readings
Forms: Moving a Form to a Group
Need additional help?
For additional Training please visit the Teaching & Learning Technologies Training site.
To submit a support request, please fill out the Microsoft 365 Support webform with as much detail as possible, or contact the Technology Help Desk team on your local campus. For password issues you must call or visit the Help Desk in person.